[V1] Instant Auth + Chat
Perfect for MVPs or new apps without built-in authentication, this version provides lightweight MagicChat auth to onboard users instantly and enable chat with minimal setup. As your product evolves, you can seamlessly migrate to any external authentication system and upgrade to a more advanced MagicChat version without losing existing users or chat history.
Prerequisites
To add chat to your application, follow these steps:
- Sign up or log in to your MagicChat account.
- Create a new app and be sure to select Version `Instant Auth + Chat` (V1) during setup
- Navigate to your created app's detail page and locate the credentials.
ℹ️
Starter Code
Clone the starter repo to use it on.
git clone -b starter https://github.com/magicchat-core/example__v1.git
Project Setup
To integrate chat into your application, follow these steps:
1. Load Required Scripts
Locate your main entry file (typically index.html) and insert this code snippet into the <head> section. Place it before other dependencies for optimal loading.
<script src="https://cdn.socket.io/4.1.2/socket.io.min.js"></script><script src="https://magicchat-core.github.io/prod-ssc-client-cdns/bundle.js"></script>2. Authentication UI Placment
Since you are opting for the Auth Service, you have two options for Authentication UI placement. You can choose based on your convenience.
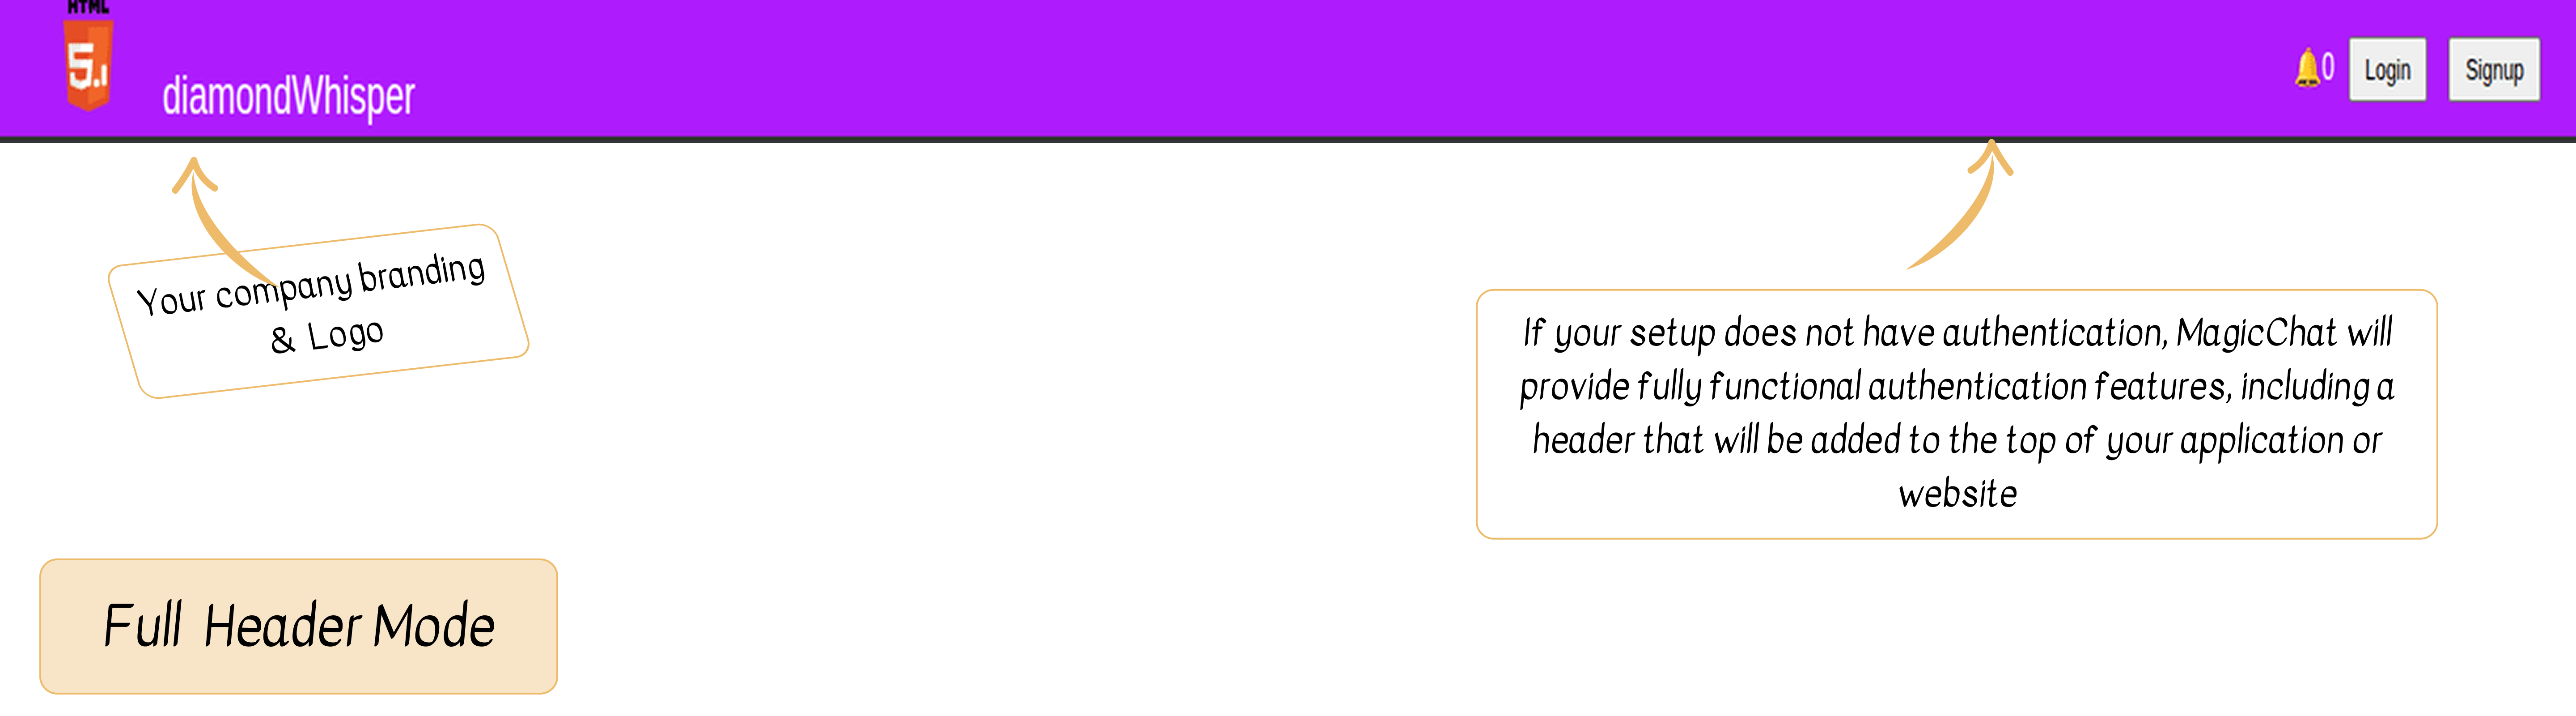
Complete Authentication Header Solution
When you set Third parameter (header_req) to true. MagicChat will automatically add a fully functional header to your application that includes:
- User authentication controls (login/logout)
- User profile management
- Notification indicators
- Branding area
- Responsive navigation menu
ℹ️
Best For
Applications without an existing header or those looking for a complete out-of-the-box authentication solution.
3. Decide the placement of the Magicchat chat box in your app.
Centralized Implementation:
For applications with a common root layout (e.g., main index.js or layout component that renders on every route), combine both setUp and initialize logic in a single location.
This ensures the chatbox renders consistently across all routes
and avoids code duplication across screens.
Final Implementation
For single-route applications where the chat interface should appear universally, use this centralized approach:
Step 1 + Step 2 – Show the chatbox on all pages under a specific root route.
Run the setUp function at your application's entry point (usually the landing page or root URL) to ensure it loads immediately when the application starts.
<script>
  document.addEventListener("DOMContentLoaded", async function () {
    // Step 1: Initial setup
    await window.magicchat_io.setUp(
      "<MAGICCHAT_APP_NAME>",
      "<MAGICCHAT_API_KEY>",
      false // Flip it to switch between 'Full Header Mode' and 'Header-Less Mode'.
    );

    // Step 2: Initialize chat
    await window.magicchat_io.initialize({"app_version":"V1"});
  });
</script>ℹ️
Parameter Details
| Parameter | Type | Description |
|---|---|---|
| app_name | string | Unique application identifier |
| api_key | string | Base64 encoded API key |
| header_req | boolean | Display header with user controls |
⚠️
Critical Requirement
The setUp function must execute before initialize in all cases.
Example Implementation
View complete implementation examples in our GitHub repository:
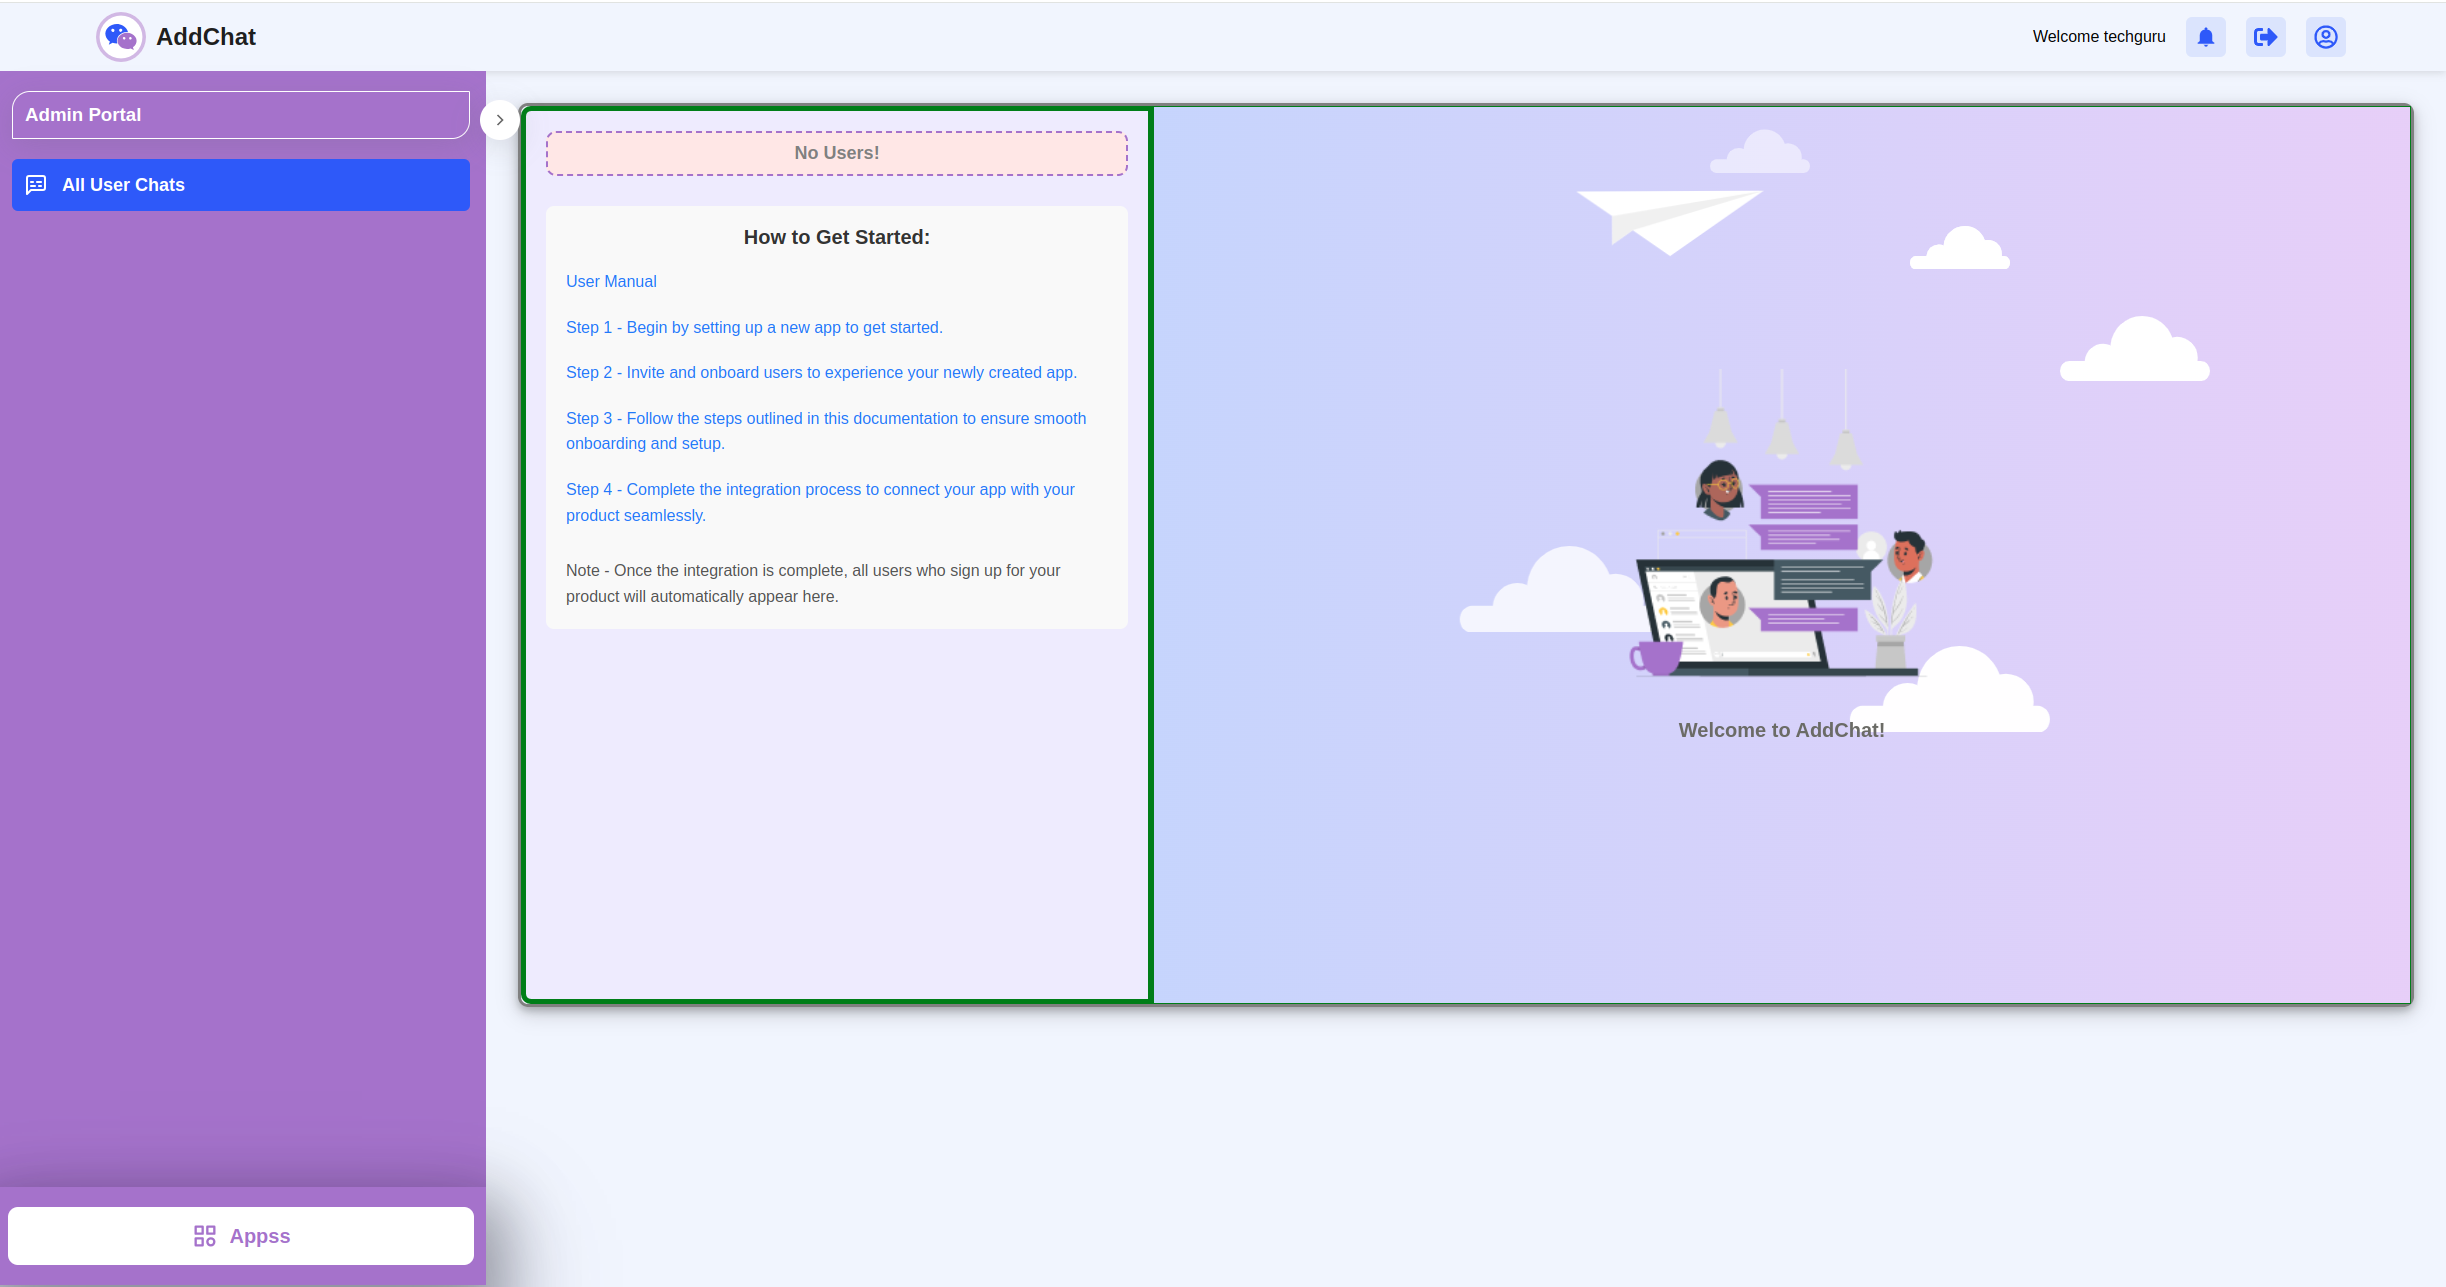
Successfully onboarded users will appear in the MagicChat Admin Panel with their associated applications.
1
Admin Panel - Onboarded Users

2
Admin Panel - No Users
Applications without onboarded users will display an empty state:
Congratulations! Your integration should now be successful!
Your users can now sign up and seamlessly chat with the Admin Team, enabling two-way communication.
Please contact our Support Team if you encounter any issues. Thank you!